Installing Our Nucs
Today was the big day...The one that I've been waiting for since last fall!
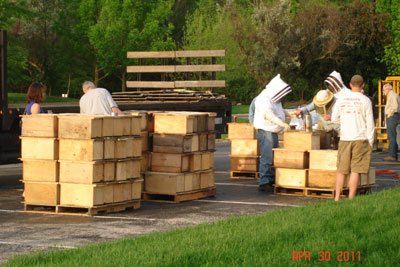
The club traveled south to pickup our nucs, and was ready to deliver them to us at 7am this morning.
Initially we were going to have two hives at my house, and one at my parent's house, but they had an extra nuc available, so we grabbed it for a second at my parents house.
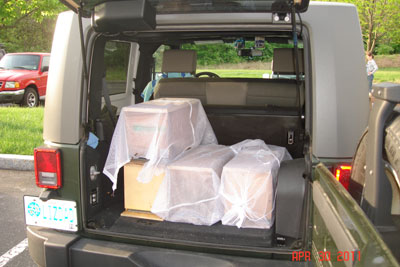
Below you can see we put them into the back of the jeep, and covered them in mesh laundry bags in an attempt to contain some of the "cling-ons".
It was in the parking lot as we were picking up our nucs that my dad got stung. At least we got that first sting out of the way!
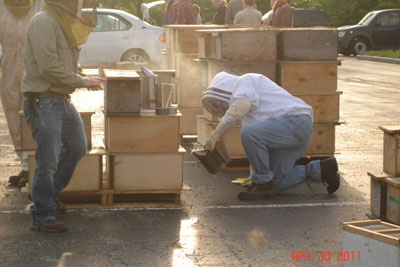
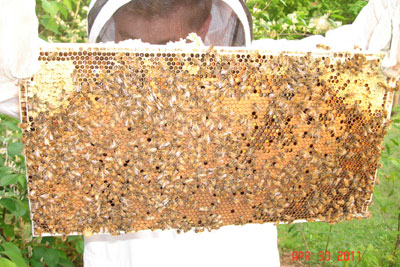
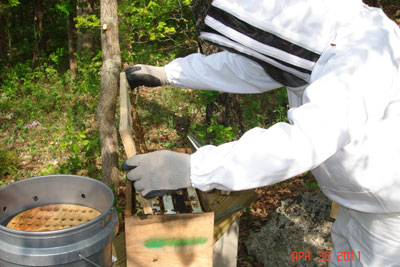
Once we got them home, we opened the cover of the nucs, and was greeted by 5 full frames of bees wanting very badly to get out.
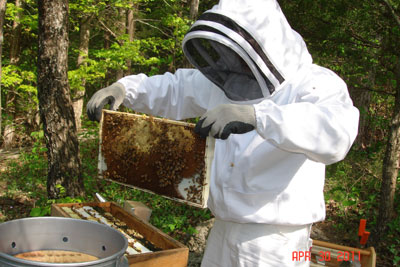
We carefully extracted each frame from the nuc, looked for the queen (which we did find on each nuc) and then put the frames into the empty hive bodies in the same order and orientation as they came out of the nuc.
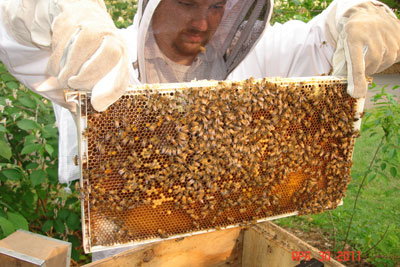
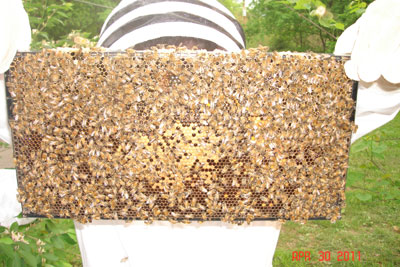
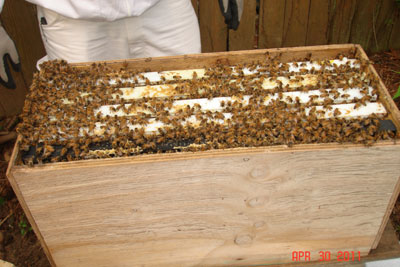
There was evidence of brood, larva, pollen and honey in each of the nucs.
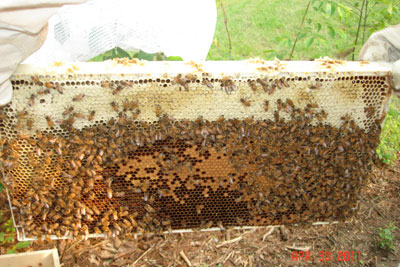
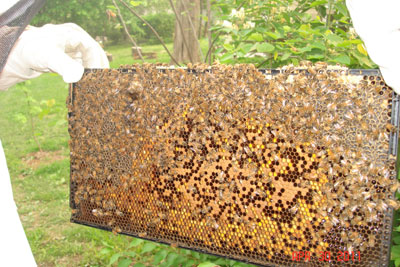
Almost all of the frames that came with the nuc were on plastic frames, either black or white.
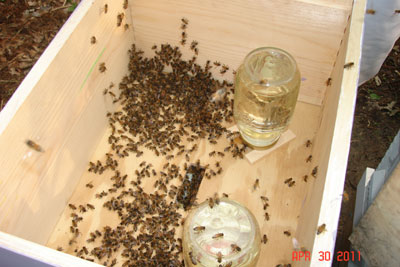
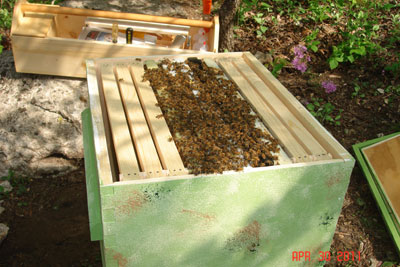
Once we got all the bees from the nuc into their hive, we added a a mix of 1:1 sugar water to feed them and stimulate them to draw out the rest of the frames of foundation.
In one of my hives I am using quart jars, another is using a gallon baggie feeder, and the ones at my dad's house are using a hive top feeder. This way we can get a feel for the pros/cons of each method.
Not picture here, but one of the cons we discovered with the gallon Ziploc baggie feeder was that even though the bag can hold a gallon of liquid sugar, you really only want to put about 3/4 of a gallon in the bag.
Otherwise it will be too full, and the slits cut into the bag will drain until the pressure inside the bag is relieved/equalized. How is it relieved? By draining a cup of the sugar water out of the bag onto the inner cover.
We had to lift the inner cover off, and drain off the pooled water so no one would drown or get soaked.
Once we finished with the hives at my house, it was time to go my parent's house.
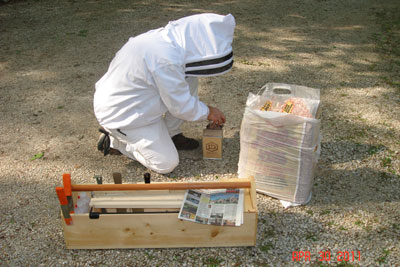
After getting the smoker ready, we were ready to install the nucs there.
This empty hive body has been sitting on the stand waiting for the nucs to arrive. Today we pulled out 5 frames of foundation from the empty hive to make room for the nuc's frames.
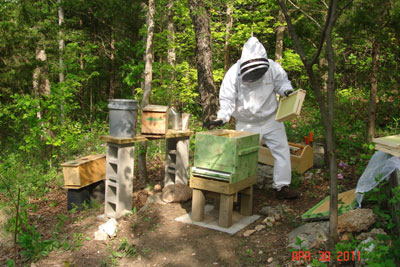
Again carefully inspecting the hive, we were able to locate the queen and was extra careful to place this frame in the hive without rolling/crushing bees.
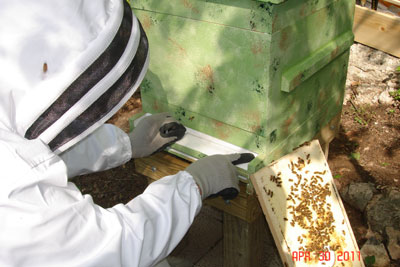
When all the nucs were installed, we placed an entrance reducer on all the hives until the bees were used to their new homes and were capable of defending their entrance themselves.
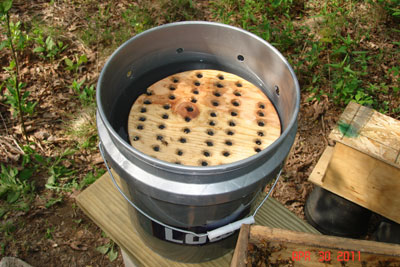
You might have seen on the edge of a few pictures above a water bucket (pictured below). Since the surrounding neighbors have swimming pools, and there is not another major water source nearby, my dad took a 5 gallon bucket and filled it with water.
He cut drain holes near the top in case the rain tried to over fill the bucket. He then took a piece of wood and cut it small enough to float inside the bucket, and drilled lots of holes for the bees to be able to stand almost anywhere on the wood and drink the water.
I was so impressed, I went home and built one for my hives!
The club traveled south to pickup our nucs, and was ready to deliver them to us at 7am this morning.
Initially we were going to have two hives at my house, and one at my parent's house, but they had an extra nuc available, so we grabbed it for a second at my parents house.
Below you can see we put them into the back of the jeep, and covered them in mesh laundry bags in an attempt to contain some of the "cling-ons".
It was in the parking lot as we were picking up our nucs that my dad got stung. At least we got that first sting out of the way!
Once we got them home, we opened the cover of the nucs, and was greeted by 5 full frames of bees wanting very badly to get out.
We carefully extracted each frame from the nuc, looked for the queen (which we did find on each nuc) and then put the frames into the empty hive bodies in the same order and orientation as they came out of the nuc.
There was evidence of brood, larva, pollen and honey in each of the nucs.
Almost all of the frames that came with the nuc were on plastic frames, either black or white.
Once we got all the bees from the nuc into their hive, we added a a mix of 1:1 sugar water to feed them and stimulate them to draw out the rest of the frames of foundation.
In one of my hives I am using quart jars, another is using a gallon baggie feeder, and the ones at my dad's house are using a hive top feeder. This way we can get a feel for the pros/cons of each method.
Not picture here, but one of the cons we discovered with the gallon Ziploc baggie feeder was that even though the bag can hold a gallon of liquid sugar, you really only want to put about 3/4 of a gallon in the bag.
Otherwise it will be too full, and the slits cut into the bag will drain until the pressure inside the bag is relieved/equalized. How is it relieved? By draining a cup of the sugar water out of the bag onto the inner cover.
We had to lift the inner cover off, and drain off the pooled water so no one would drown or get soaked.
Once we finished with the hives at my house, it was time to go my parent's house.
After getting the smoker ready, we were ready to install the nucs there.
This empty hive body has been sitting on the stand waiting for the nucs to arrive. Today we pulled out 5 frames of foundation from the empty hive to make room for the nuc's frames.
Again carefully inspecting the hive, we were able to locate the queen and was extra careful to place this frame in the hive without rolling/crushing bees.
When all the nucs were installed, we placed an entrance reducer on all the hives until the bees were used to their new homes and were capable of defending their entrance themselves.
You might have seen on the edge of a few pictures above a water bucket (pictured below). Since the surrounding neighbors have swimming pools, and there is not another major water source nearby, my dad took a 5 gallon bucket and filled it with water.
He cut drain holes near the top in case the rain tried to over fill the bucket. He then took a piece of wood and cut it small enough to float inside the bucket, and drilled lots of holes for the bees to be able to stand almost anywhere on the wood and drink the water.
I was so impressed, I went home and built one for my hives!
Comments For This Post: (0) Be The First! | Post Your Comments!
Hide The Comment Form
