Hive Top Feeder For Nuc
A few weeks ago I made some heavy duty nuc boxes and this week I bought some scrap 1" x 6" lumber from the cull cart at Home Depot (70% off) and made a hive top feeder.
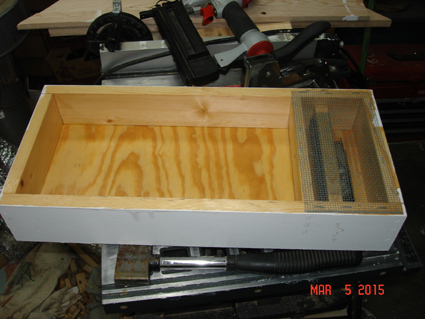
Mostly I followed the Miller style hive top feeder directions that I've used in the past, and decided to modify the feeder so that the opening for the bees wasn't in the middle of the feeder, but instead, off to one side only.
I've never had problems with a hive top feeder where the opening was in the middle, but I wanted to experiment with a single opening, offset to the side.
Below are pictures of building the feeder.
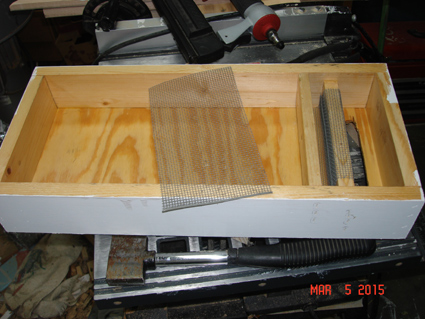
I coated the inside of the feeder in two coats of polyurethane to seal the wood.
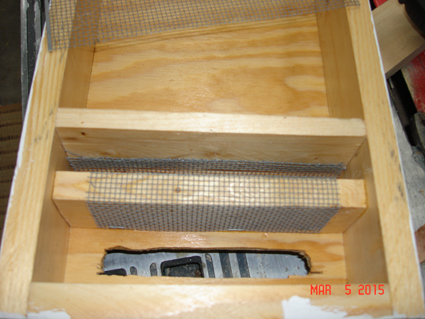
I also wrapped the wooden barrier components in screen so the bees would be able to grip onto it easier as they climbed up into the area where the syrup would be.
Then I took a section of screen, folded it into a "V" shape and tucked it into the area between the two dividers.
You can refer to the directions in the links above to see how the dividers work to allow syrup in, and keep bees from drowning.
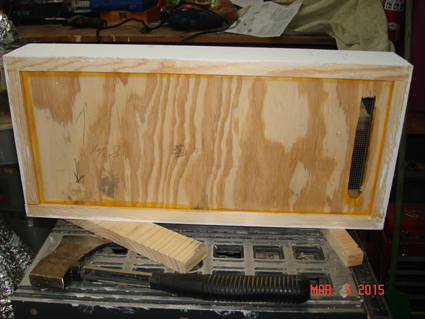
The bottom of the feeder has a rudimentary opening cut with a jig saw. You'd swear though I did it with my eyes closed. I don't think it matters, the bees will be happy enough to have syrup, they won't mind the opening isn't symmetrical and pretty looking.
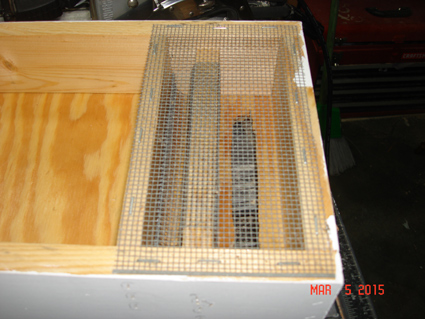
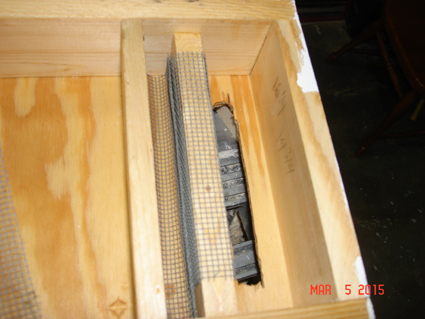
Here's a close up with the final piece of screen in place. This screen is helpful to provide a barrier between the bees and the beekeeper. It allows the beekeeper to open the hive cover, inspect the feeder and add more syrup without the bees being able to escape.
Next week I'll go get more wood and build a second one for the other nuc I have. Total cost (from using culled wood) and scrap screen was $3.
Mostly I followed the Miller style hive top feeder directions that I've used in the past, and decided to modify the feeder so that the opening for the bees wasn't in the middle of the feeder, but instead, off to one side only.
I've never had problems with a hive top feeder where the opening was in the middle, but I wanted to experiment with a single opening, offset to the side.
Below are pictures of building the feeder.
I coated the inside of the feeder in two coats of polyurethane to seal the wood.
I also wrapped the wooden barrier components in screen so the bees would be able to grip onto it easier as they climbed up into the area where the syrup would be.
Then I took a section of screen, folded it into a "V" shape and tucked it into the area between the two dividers.
You can refer to the directions in the links above to see how the dividers work to allow syrup in, and keep bees from drowning.
The bottom of the feeder has a rudimentary opening cut with a jig saw. You'd swear though I did it with my eyes closed. I don't think it matters, the bees will be happy enough to have syrup, they won't mind the opening isn't symmetrical and pretty looking.
Here's a close up with the final piece of screen in place. This screen is helpful to provide a barrier between the bees and the beekeeper. It allows the beekeeper to open the hive cover, inspect the feeder and add more syrup without the bees being able to escape.
Next week I'll go get more wood and build a second one for the other nuc I have. Total cost (from using culled wood) and scrap screen was $3.
Comments For This Post: (4) | Post Your Comments!
Hide The Comment Form
